Since all hobbits are drawn to the green world, many of us feel a tinge of sadness as autumn creeps in and slowly steals away our beloved wildflowers, vegetables, and green tree leaves. But what if there was a simple way to preserve some of those bright summer hues to enjoy all year long?
As summer in the Shire winds down, now is an excellent time to try your hand at pressing flowers! You can use the dried petals, leaves, and whole blossoms to create endless crafts, from bookmarks to candle decor. Join Kili as she guides you through selecting blooms in this new episode of Happy Hobbit. She then shows how to assemble the flower press and reveals the finished results.
Have you ever pressed flowers before? Did you use a press or a book? How did it turn out? Let us know in the comments on the video!
Happy Hobbit has brought Middle-earth to its viewers’ daily lives since joining TheOneRing.net in 2012! Learn hobbity recipes, crafts, and more by watching new episodes and/or perusing the 13+ years worth of videos on their YouTube channel. 🌻 Be sure you are subscribed to Happy Hobbit on YouTube and check back here at TheOneRing.net so that you don’t miss out!
Get even more slow-living hobbit content by following Happy Hobbit on Instagram, Facebook, Twitter, and TikTok! If watching the show has left you with an appetite for more, know that Kili (Kellie) has a podcast where Tolkien is often mentioned called Forests, Folklore & Fantasy. She is also the co-author of the recently re-released Middle-earth from Script to Screen.
The scent of Sweet Annie is is a blend of herbal greens, subtle spice, and something reminiscent of the pages of a dusty old tome. I imagine it’s the type of plant hobbit women have long grown, dried, and tucked into their drawers as sachets to scent their clothing. It is also excellent as part of a dried flower arrangement or wreath. If these ideas have tempted you but you fear you don’t have a green thumb, then let me reassure you: Sweet Annie is a hardy, carefree annual that is very easy to grow!
Just a small container has abundant uses all year long. Join me in the video below as I grow Sweet Annie (Artemisia annua) from seed, harvest fragrant bundles at the end of summer, and dry them for the autumn hobbit hole. I’ll share tips for planting, caring for Sweet Annie, harvesting at the right time, drying stems, and a bit about my health journey last year (2025).
Click on the video below to watch, and keep scrolling for a growing guide! For a printer-friendly PDF version, click here.
Sweet Annie Growing Guide
Just a small container of this easy-to-grow annual has abundant uses all year long. For reference, I started mine in May and I live in USDA gardening zone 9 (or 7 depending on where I am planting).
Sowing
Prepare a container or garden bed in an area that will get full sun exposure. There is no real need to add amendments to the soil as Sweet Annie is hardy and not super hungry.
Start indoors 6-8 weeks before last frost date or
Start outside after all danger of frost has passed.
The seeds need light to germinate, so even the surface of the soil then scatter them on top.
Water in the seeds and place a mesh protector over if desired.
Growing
Full sun
Well-drained soil
Germination time: 10-20 days (but I saw some growth at day 5!)
Space 18–24 inches apart (thin seedlings when they are 3-4 inches tall). I obviously didn’t do this.
Harvesting
Cut stems just as the little yellow flower buds are starting to open. For me, this was in August.
Gather the stems and arrange in small bundles
Drying
Hang upside down in a warm, airy place
Keep out of direct sunlight
Uses
Fragrant dried bouquets
Wreaths and garlands
Sachets for your drawers
Tucked into cupboards and seasonal displays
Yuletide gifts!
Happy Hobbit has brought Middle-earth to its viewers’ daily lives since joining TheOneRing.net in 2012! Learn hobbity recipes, crafts, and more by watching new episodes and/or perusing the 13+ years worth of videos on their YouTube channel. 🌻 Be sure you are subscribed to Happy Hobbit on YouTube and check back here at TheOneRing.net so that you don’t miss out!
Get even more slow-living hobbit content by following Happy Hobbit on Instagram,Facebook, Twitter, and TikTok! If watching the show has left you with an appetite for more, know that Kili (Kellie) has a podcast where Tolkien is often mentioned called Forests, Folklore & Fantasy. She is also the co-author of the recently re-released Middle-earth from Script to Screen.
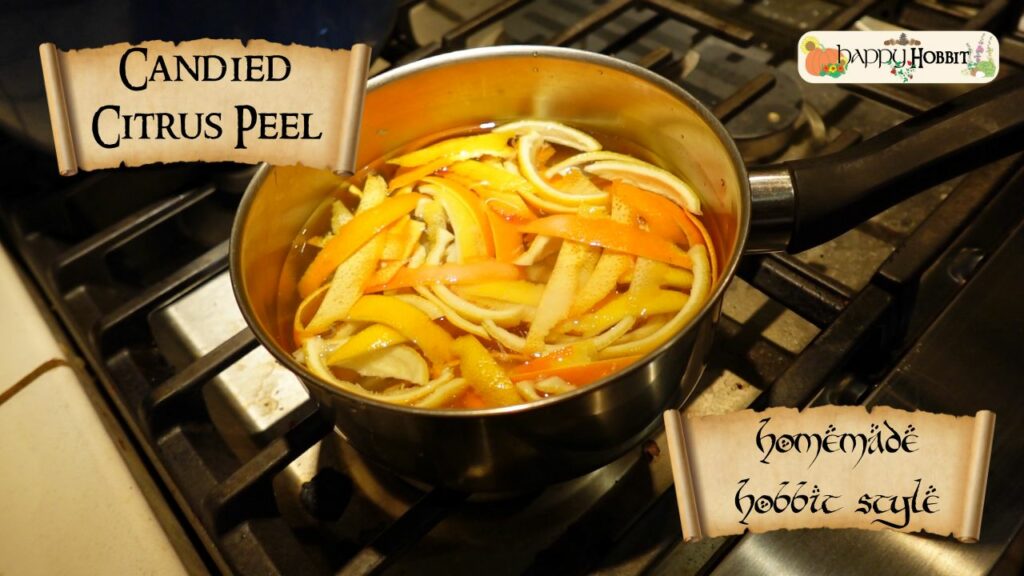
Are the prices at the Shire market making you worry that you can’t afford ingredients for Yuletide fare? Then let Kili show you how to make a holiday baking staple, candied citrus peel, using just 4 common ingredients and your own stovetop! Watch the episode.
Candied Citrus Peel
Ingredients:
3 lemons
2 oranges
2 teaspoons of salt
1 cup (200 grams) sugar
Instructions:
Wash the lemons and oranges.
Cut the fruit in half, then in quarters. Remove the flesh and set aside for another use. Carefully peel off the rind using either a knife or a vegetable peeler.
Cut the peels into 1/4 inch thick strips.
Place the peels in a non-reactive pot and cover with water. Add a teaspoon of salt and bring to a boil. Simmer for 10 minutes to remove the bitterness.
Drain the peels and rinse out the pot. Repeat the process with fresh water and the second teaspoon of salt.
Drain the peels and rinse the pot. Return the peels to the pot, cover with water, and add the cup of sugar.
Simmer for about an hour, stirring on occasion, checking the peels. Once they’re soft and translucent, they’re finished. Drain the peels again.
Separate the peels onto a plate and allow them to dry overnight.
Separate the peels by fruit and place in airtight containers. They should keep in the refrigerator for at least a month.
Happy Hobbit has brought Middle-earth to its viewers’ daily lives since joining TheOneRing.net in 2012! Learn hobbity recipes, crafts, and more by watching new episodes and/or perusing the 10+ years worth of videos on their YouTube channel. 🌻 Be sure you are subscribed to Happy Hobbit on YouTube and check back here at TheOneRing.net so that you don’t miss out!
Get even more slow-living hobbit content by following Happy Hobbit on Instagram,Facebook, Twitter, and TikTok! If watching the show has left you with an appetite for more, know that Kili (Kellie) has a podcast where Tolkien is often mentioned called Forests, Folklore & Fantasy.
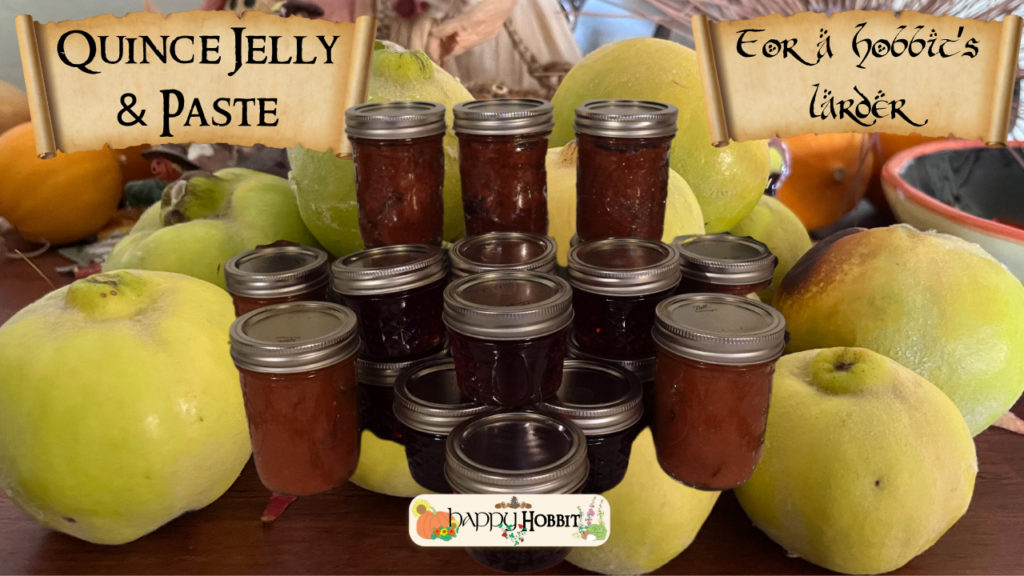
This unique fruit from the east may be a mystery to many a hobbit, but not this one! Join Kili as she shows you how to get many jars of preserves out of an armload of quince fruit – perfect for enjoying all winter long in your own hobbit hole, or for gifting! Be sure to check your local markets for the last of this (somewhat rare) seasonal fruit, or ask your fellow Shirelings if they have any growing. Many folk don’t know how to prepare quince and thus are happy to give it away to those who do. Free food is something every hobbit likes to hear! The preserves taste like a combination of apple and pear with a hint of rose, and, of course, a blush of sweetness. Watch the episode.
Quince Jelly and Paste
Ingredients:
Quince
Sugar
Optional: Citric acid – I like to add it because it preserves the beautiful red color, the taste, and the freshness of this yellow fruit
Quince Jelly Instructions:
If your quince have a bit of fuzz or pelt, rub it off with a towel.
With a very sharp knife, cut the quince into quarters. If you are only interested in making quince jelly, you will not need to core them! Coring them because it makes it a bit easier to then make quince jam.
If your quince are very big, you can cut the quarters in half again.
Place fruit pieces into a large pot.
Add just enough water to cover the quince.
Over high heat, bring the quince to a boil until they are soft but not mushy. Take the pot off the heat.
Let the pot with the quince stand for a few hours – I forgot to mention this part in the video, but it’s an important step as it helps the pectin begin to do its thing.
Line a colander with cheesecloth or muslin cloth. Put the quince and their cooking liquid into the colander and let them drain overnight into a large bowl or basin.
The next day, weigh the strained liquid (be sure to tare the scale so that you don’t count the weight of the bowl).
Weigh the sugar, which should be 75% of the quince juice in weight. I made it a loose guess.
Add both to a large sauce pot with about ¼ tsp of citric acid.
Bring the jelly mixture to a rolling boil and keep boiling until the juice turns red and reaches the set point. You can test that with the gel test on a small plate or using a metal spoon as I showed in the video.
Pour the hot jelly into sterilized jars, wipe the rims, and close them with a lid.
Carefully drop the jars into a pot of boiling water with an inch of water covering them. Allow them to boil for 10 mins, then remove to a dishtowel to cool. They will be hot!
Let them rest for a day, then test their seals (the button on top of the can should be sucked in and not making a clicking sound). At this point, they are safe to be labeled and stored. Remember to keep the metal rings loose – that way you can accurately check the seal on the jar up to 18 months later when you are inspecting them for freshness and food safety. Store in your hobbit larder or give as gifts! Note: If you do not wish to can your preserves, you can store them in the refrigerator. This is a great option if you have a smaller amount than what I was working with!
Quince Paste Instructions:
Transfer the drained fruit to a fine mesh strainer and pass the cooked quinces through the strainer with the back of a spoon or a big wooden tamper.
Alternatively, you can mash the fruit with a potato masher or in a food processor (if you have cored the quince).
Weigh your quince mass (again, be sure to tare the scale to not include the weight of the bowl), then measure out roughly 2/3 of the total weight in sugar and add it to the quince mash.
Add the mashed fruit to a large saucepan. Over low heat, bring to a boil while constantly stirring until the sugar is dissolved.
Continue boiling the fruit mass until it turns red – this may take a half hour or so.
Spoon into sanitized jars and follow the water bath canning method described above, or store in your refrigerator.
If you are interested in making the quince candy, then please refer to Our Gabled Home, from whom I learned this recipe.
Happy Hobbit has brought Middle-earth to its viewers’ daily lives since joining TheOneRing.net in 2012! Learn hobbity recipes, crafts, and more by watching new episodes and/or perusing the 10+ years worth of videos on their YouTube channel. 🌻 New episodes debut every other Saturday. Be sure you are subscribed to Happy Hobbit on YouTube and check back here at TheOneRing.net so that you don’t miss out!
Get even more slow-living hobbit content by following Happy Hobbit on Instagram,Facebook, Twitter, and TikTok! If watching the show has left you with an appetite for more, know that Kili (Kellie) has a podcast where Tolkien is often mentioned called Forests, Folklore & Fantasy.
Want to impress your fellow hobbits or other denizens of Arda by bringing a dazzling, unique side to your next feast? Then look no further than this delicious and colorful recipe! Join Kili as she shows you how she turned some purple carrots from her hobbit garden into a scrumptious dish… and discovers something spooky about the carrots along the way! Watch the episode.
Quick Pickled Carrots
Ingredients:
About 1 lb of carrots, tops removed, peeled if needed, sliced into rounds or sticks
A diced onion (I used purple to keep on theme!)
1 cup of water
2/3 – 1 cup distilled white or apple cider vinegar
1 Tbsp sea salt
1 Tbsp organic cane sugar (or stevia to taste)
1 tsp celery seeds
1 1/2 tsp mustard seeds
1 tsp coriander seeds
2-6 cloves of peeled garlic
Sprigs of fresh dill
Instructions:
Parboil carrots for a few minutes just to soften them. Drain and set aside.
Dice up the onion.
Add carrots to a large mason jar or glass container. Set aside.
To a small saucepan, add distilled white (or apple cider) vinegar, water, salt, and sugar. Bring to a simmer over medium heat and stir to fully dissolve salt and sugar and solids. Taste and adjust flavor as needed, adding more salt or sugar to taste.
Add the celery, mustard, and coriander seeds to the jar. Add the peeled garlic and the fresh dill.
Stuff the carrots and onions into the jar.
Pour the brine over the carrots, ensuring they are fully submerged. If needed, add more vinegar or a little water to cover.
Seal well and shake to combine. Then refrigerate for at least 1 hour. The flavors will deepen and intensify the longer it marinates. Best flavor is achieved after 24 hours.
Will keep in the refrigerator for 2-3 weeks (sometimes longer). Not freezer friendly.
Happy Hobbit has brought Middle-earth to its viewers’ daily lives since joining TheOneRing.net in 2012! Learn hobbity recipes, crafts, and more by watching new episodes and/or perusing the 10+ years worth of videos on their YouTube channel. 🌻 New episodes debut every other Saturday. Be sure you are subscribed to Happy Hobbit on YouTube and check back here at TheOneRing.net so that you don’t miss out!
Get even more slow-living hobbit content by following Happy Hobbit on Instagram,Facebook, Twitter, and TikTok! If watching the show has left you with an appetite for more, know that Kili (Kellie) has a podcast where Tolkien is often mentioned called Forests, Folklore & Fantasy.
New York Comic Con was a wonderful place to be for Tolkien fans! Other than the excellent coverage by staffer greendragon who interviewed several of the creatives behind the upcoming The Lord of the Rings: The War of the Rohirrim (look out for the videos on TORn’s YouTube and socials), Kili from Happy Hobbit got to chat with some amazing Tolkien-inspired artists on the showroom floor. You can hear their stories below and be sure to check out the links to their amazing creations! Watch the episode.
Happy Hobbit has brought Middle-earth to its viewers’ daily lives since 2012! Learn hobbity recipes, crafts, and more by watching new episodes and/or perusing the 10+ years worth of videos on their YouTube channel. 🌻 New episodes debut every other Saturday, so be sure you are subscribed to Happy Hobbit so that you don’t miss out!
Get even more slow-living hobbit content by following Happy Hobbit on Instagram,Facebook, Twitter, and TikTok! If watching the show has left you with an appetite for more, know that Kili (Kellie) has a podcast where Tolkien is often mentioned called Forests, Folklore & Fantasy.